
Every part passed inspection, yet the lid does not close on one product in twenty. This is the classic symptom of an unchecked tolerance stack-up: each dimension is within its own tolerance, but the variations add up across the assembly until a gap closes or a hole no longer lines up. Suppliers cannot see this from a single part drawing — it is a design responsibility, and it is far cheaper to find on screen than on the production line.
A stack-up analysis follows a chain of dimensions from one feature to another through every part in between, and calculates the range the critical gap can take. It is one of the most useful checks before releasing drawings for tooling.
How to build a stack-up
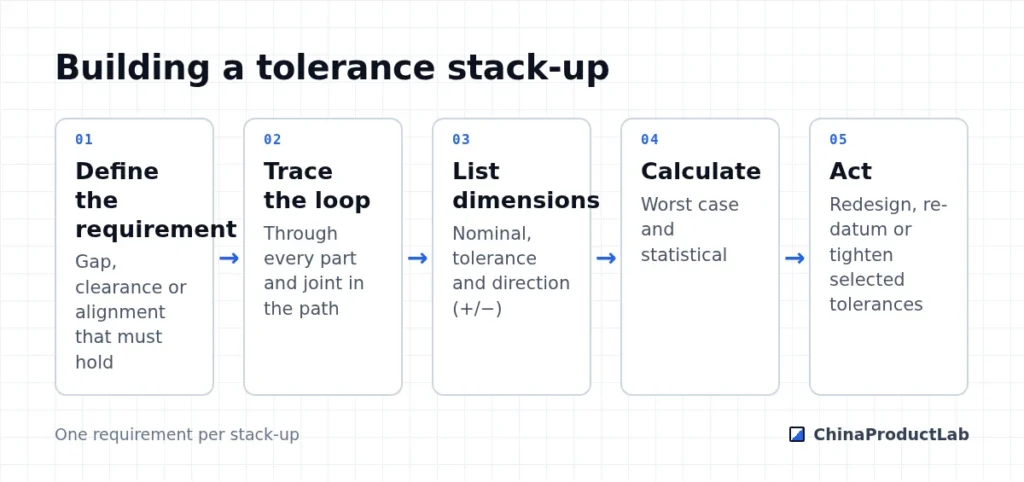
Work from datums that reflect how parts actually locate in the assembly — the faces and pins that touch — not from whatever datums were convenient when drawing each part. A stack-up through the wrong reference gives a precise answer to the wrong question.
Worst case vs. statistical
| Method | How it works | When to use |
|---|---|---|
| Worst case | Adds all tolerances at their limits | Safety-critical fits, few parts in the loop, low volumes |
| Statistical (RSS) | Root-sum-square of tolerances; assumes independent, centered processes | Many parts in the loop, volume production with capable processes |
| Monte Carlo | Simulates many random assemblies, any distribution | Complex geometry, non-normal processes, software available |
Worst-case results are often pessimistic for long chains, and statistical results are optimistic if processes are not centered or not stable. Many teams calculate both and design so that worst case is acceptable for critical functions, and statistical is acceptable for the rest.
What to do with the result
- Shorten the loop — fewer parts between the features that matter
- Locate parts on the feature that controls the requirement (pins, bosses) instead of on outer edges
- Add adjustment (slots, shims) where tight tolerances would be expensive
- Tighten only the few dimensions with the largest contribution
- Mark critical dimensions on drawings so suppliers measure and report them
- Re-run the stack-up after every design change in the loop
Tightening every tolerance is the most expensive way to fix a stack-up; machining and molding costs rise quickly as tolerances shrink. Usually two or three dimensions dominate the result — find them first.
A simple worked approach
Take a battery cover that must leave a gap between 0.1 and 0.5 mm to the housing. The loop runs from the housing opening, through the cover hinge position, to the cover edge — perhaps four dimensions on two parts. List each with its tolerance and direction, add them for the worst case, and calculate the root-sum-square for the statistical case. If the worst case can reach zero gap, you know the cover may rub on some units; the list also shows which of the four dimensions contributes most.
Spreadsheets are enough for one-dimensional stack-ups like this. For 3D problems involving angles and several directions, tolerance analysis software or a careful 3D CAD study is worth the effort. In every case, keep the stack-up file with the drawings so that it can be updated when a dimension changes.
Working with suppliers
Share the critical requirement with your supplier, not only the part drawing. A molder who knows that a boss position controls a key gap can place the gate and cooling accordingly; a machinist can choose fixturing that holds the right datum. Ask for capability data on the critical dimensions once production starts, and compare it with the assumptions in your statistical stack-up.
Related: CNC machining tolerances, DFM review checklist and product development. Send your assembly for a review.