The surface of a molded part is a copy of the mold steel. Whether a housing looks premium, shows every fingerprint or hides flow lines is decided when the mold is polished or textured — and changing it afterwards means reworking the tool. Specifying the finish with a recognised standard avoids “we thought you meant…” discussions at the first samples.
Common standards
| Standard | Grades | Look | Typical use |
|---|---|---|---|
| SPI A (diamond polish) | A-1 to A-3 | High gloss, mirror | Lenses, light guides, gloss trims |
| SPI B (paper polish) | B-1 to B-3 | Semi-gloss | Parts where some gloss is wanted without lens quality |
| SPI C (stone polish) | C-1 to C-3 | Low gloss, matte | Internal parts, industrial parts |
| SPI D (blasted) | D-1 to D-3 | Satin to rough matte | Grips, housings hiding marks |
| VDI 3400 (EDM texture) | e.g. VDI 12 – VDI 45 | Fine to coarse spark-eroded texture | Housings, technical products |
| Chemical / laser textures | Supplier catalogues | Leather, geometric, brand textures | Consumer products, automotive interiors |
Texture and draft
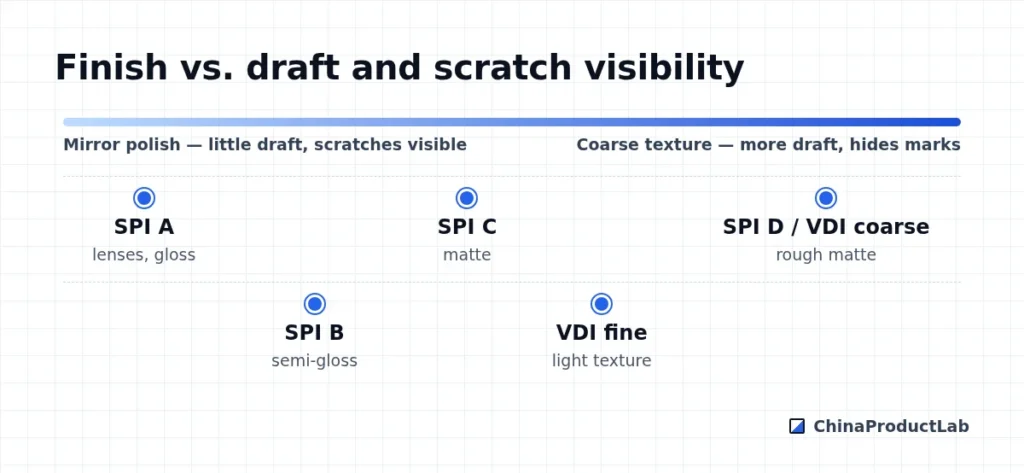
Textured walls need more draft than polished ones, because the texture forms tiny undercuts that drag during ejection. Texture suppliers publish recommended draft per texture depth — a common rule of thumb is roughly an extra degree of draft for each 0.025 mm of texture depth, but follow the supplier’s table for the chosen pattern.
Choosing a finish
- High gloss shows sink marks, weld lines, dust and scratches — use only where needed
- Light textures hide molding marks and fingerprints; good default for housings
- Matching finish across parts from different molds and materials needs a shared reference sample
- Texture changes perceived color and gloss — approve them together
- Polish and texture add tool cost and lead time; high polish adds most
- Plan finish areas on the drawing, including where texture stops
Specifying finish on drawings
Mark finish zones directly on the drawing or a separate cosmetic drawing: for example, “Zone A: VDI 27, Zone B: SPI B-2, internal surfaces: as machined”. Include where texture stops and how the transition looks, because texture boundaries are visible. Specify which finish applies to which mold half, especially for parts with cosmetic surfaces on both sides.
Also consider maintenance. Textured molds wear and collect residue over time; glossy surfaces scratch during mold cleaning. Ask the molder how they maintain finishes and how often textures need re-treatment for your expected volume. When you build a second mold or transfer a tool, use the same texture supplier and pattern number, and compare plaques side by side, to keep parts from different molds visually consistent.
Approving the finish
Ask the molder or texture house for physical plaques of the proposed finishes in your actual resin and color — the same texture looks different on black PC/ABS and light-grey ABS. Approve plaques before texturing, then approve T1 parts against them. Textures are usually applied after the mold has been trialled and dimensionally approved, because changes to textured steel are harder.
Related: design for injection molding, golden and limit samples and mold cost. Send your part for a finish recommendation.