You paid for the molds, but they sit in someone else’s factory. That is normal — until quality drops, prices rise, or the supplier closes, and you discover that “your” tooling is hard to get back. Mold transfer is common and manageable, but only if ownership and documentation were set up before you needed them.
Set it up at the start
- Ownership stated in the purchase order and contract, with the tool list and invoice references
- Right to inspect, photograph and remove the tools with reasonable notice
- Mold nameplates or markings identifying your company and tool number
- Agreed maintenance responsibilities and expected shot life
- Copies of mold drawings or at least key specifications (steel, cavities, hot runner, machine size)
Before moving a mold
| Check | Why |
|---|---|
| Tool inventory | Molds, inserts, spare parts, fixtures, gauges — everything you own |
| Condition and last samples | Know whether wear or damage exists before the move |
| Machine compatibility | Clamp tonnage, platen size, ejector layout, nozzle, hot-runner controller at the new factory |
| Process data | Temperatures, pressures, cycle time from the current supplier, if available |
| Golden samples | The quality reference the new supplier must match |
The transfer itself
- Agree a release date and payment of any open invoices.
- Photograph and document every tool at pickup; check for missing inserts.
- Pack properly (rust protection, fixed moving parts) and insure the shipment.
- At the new supplier: inspect, clean, repair if needed, and run T1 samples.
- Approve samples against the golden sample before production.
Typical timeline of a transfer
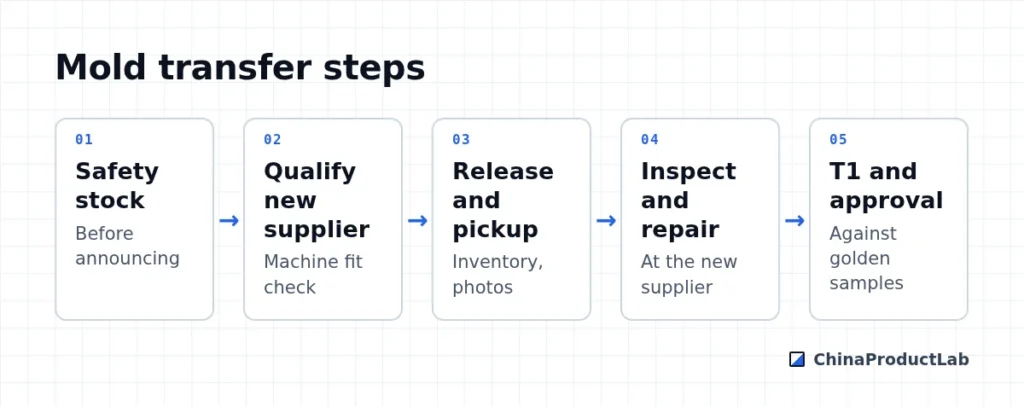
Mold transfers usually take longer than the shipping time suggests. A realistic plan includes the following stages; each can add weeks if documents or tools are incomplete:
- Build safety stock with the current supplier while relations are still workable.
- Qualify the new supplier: audit, quotation, machine fit check using the mold specifications.
- Release and pickup: inventory list signed by both parties, photos, packing.
- Inspection and repair at the new supplier; replace worn components if needed.
- T1 trial, dimensional report and comparison with golden samples.
- Corrections and approval; pilot batch; then full production.
Keep communication with the outgoing supplier factual and documented. Disputes over open invoices or “mold maintenance fees” are the most common reason tools are held back — clarify the payment status and contract terms before announcing a move.
Documents worth keeping for every tool
- Tool number, part numbers and revisions the tool produces
- Invoice and payment proof showing that the tool was paid for
- Steel grade, number of cavities, runner type and expected shot life
- Press size and auxiliary equipment needed (hot-runner controller, core pulls, mold temperature units)
- Photos of the tool from all sides and of the parting line
- Maintenance and repair history, including modifications after T1
- Last approved process sheet and inspection report
Ask for these documents when the tool is approved, not when you decide to move it. A supplier is usually willing to share them while the relationship is good; the same request during a dispute is much harder.
Risks to plan for
- Supplier delays release — keep the relationship professional and documents ready
- Hidden wear appears at the new factory
- Process differences change dimensions or cosmetics
- Production gap during transfer — build safety stock first
Related: injection mold cost, protecting your IP and golden samples. Talk to us about moving existing tooling.