
Snap fits remove screws, speed up assembly and can look cleaner — until the hook breaks on the first opening, or the housing rattles because the snap never fully engages. Snap-fit design is a balance between assembly force, retention, material strain and moldability. A few rules and early testing on the right material prevent most problems.
Types of snap fits
| Type | How it works | Typical use |
|---|---|---|
| Cantilever | A beam with a hook deflects and catches a ledge | Housings, covers, battery doors |
| Annular | A ring or bead expands over a groove | Caps, round closures |
| Torsional | A bar twists to release the hook | Latches that must be released by pressing |
Design rules for cantilever snaps
- Keep strain during assembly below the material’s allowable value (from the resin supplier)
- Taper the beam (thicker at the root) to spread strain
- Radius the root — a sharp corner concentrates stress and cracks
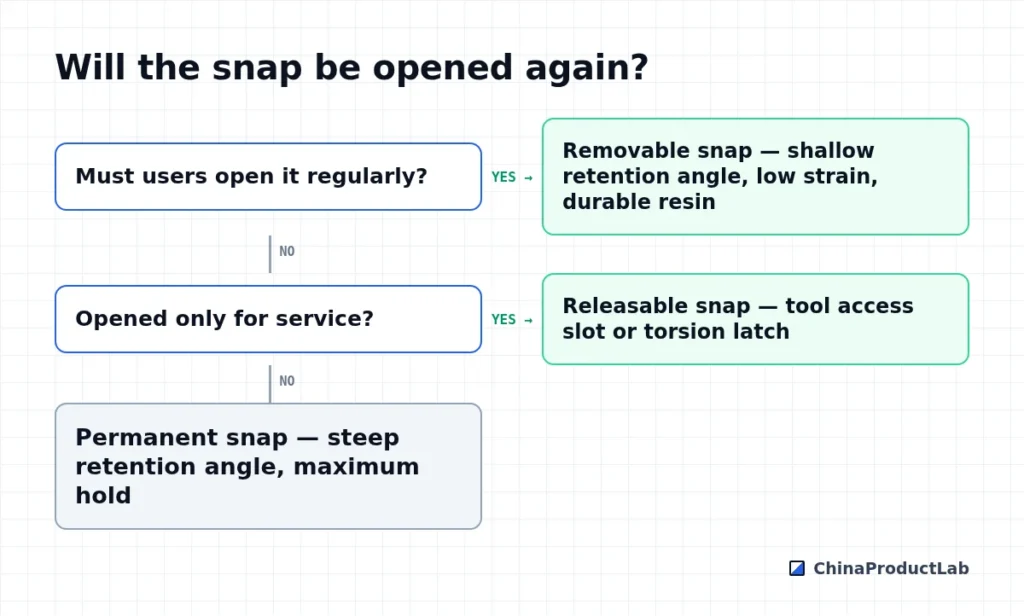
- Lead-in angle for assembly; retention angle sets whether it can be opened (around 90° is permanent)
- Enough deflection space behind the hook
- Plan how the hook is molded: through-holes or sliders for undercuts
Material matters
Ductile materials such as PP, PA and PC/ABS tolerate higher strain than brittle ones like glass-filled grades or PMMA. Glass fibers increase stiffness and reduce allowable strain. Nylon properties change with moisture, so test parts conditioned to realistic humidity. If the snap is opened often, consider fatigue: a hook that survives one assembly may crack after dozens.
Assembly and service considerations
Snap fits change how the product is assembled and serviced. Design the assembly sequence so each snap can be engaged with a simple straight motion, and give operators visual or audible feedback that it is fully engaged. Hidden snaps that need a special tool to release should be marked in the service manual, or the product will be damaged during repair.
- Add locating features so parts align before snaps engage
- Avoid snaps that must engage simultaneously around a long perimeter
- Combine a few screws with snaps when the joint must carry high loads
- Keep snap locations away from cosmetic surfaces to hide sink and witness lines
- Plan mold modification steps — adding material to a hook is easier than removing it
Start with slightly less interference in the mold and increase after trials. Toolmakers can add steel safely; removing steel means welding.
Prototyping and testing
3D-printed snaps behave differently from molded ones — layer lines weaken them and the material is different. Use printed parts to check geometry and assembly sequence, but validate strength on molded or machined parts in the production resin. Test assembly force, retention force and repeated cycles at hot and cold temperatures.
- Does the snap engage audibly and fully?
- Is the assembly force acceptable for the operator?
- Does the part rattle? Add a small preload or ribs
- Can tolerances leave the hook just short of the ledge?
Related: injection molding design rules, enclosure materials and injection molding.